

Table of Contents
- What You'll Need Before You Start
- Step 1: Prep Your Natural Nails Like a Pro
- Step 2: Size Each Press-On Nail Correctly
- Step 3: Press-On Nails Glue vs Sticky Tabs
- Step 4: Apply Your Press-On Nails Without Bubbles
- How to Make Press-On Nails Stay On Longer
- How to Remove Press-On Nails Without Damage
- Troubleshooting Common Application Mistakes
- Frequently Asked Questions
Last Updated: September 18, 2026
What You'll Need Before You Start
Applying press-on nails at home takes about 15 minutes once you know the steps. This guide from Liquid Glamour Nails walks beginners through prep, sizing, application, and removal so the set lasts and your natural nails stay healthy.
Press-on nails are pre-shaped, pre-decorated nail covers that attach to your natural nails with glue or adhesive tabs. They give you a salon-style manicure without the appointment, the drying time, or the cost of recurring visits.
Many beginners quit after one bad set. The nails pop off in a day, or they look lumpy. The fix is almost never the product. It's the prep.
Below, we'll show you exactly how to apply press-on nails for beginners, step by step, plus how to make them last and take them off safely.
Essential Tools and Supplies
Gather these before you open your nail set:
- A cuticle pusher or wooden orange stick for pushing back cuticles
- A fine-grit nail file or buffer
- Isopropyl alcohol or a nail dehydrator
- A lint-free wipe or cotton pad
- Nail glue or adhesive tabs (most sets include both)
- Cuticle oil for aftercare
A common mistake is skipping the dehydrator step. Oils and moisture block the adhesive bond, which is why so many sets lift early.
Choosing the Right Press-On Nail Set
Look for sets that include multiple sizes, not one-size-fits-all strips. Fit matters more than design.
Check three things:
- Size range: small, medium, and large options fit more nail widths
- Shape: short square and squoval suit beginners best
- Reusability: reusable sets stretch your cost per wear
Step 1: Prep Your Natural Nails Like a Pro
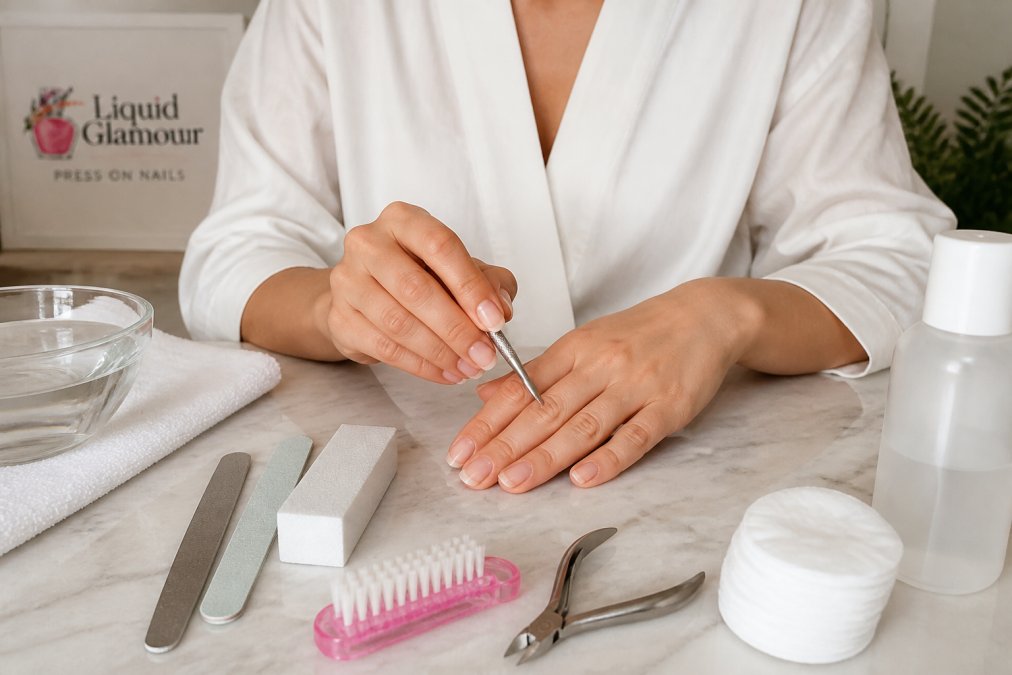
Clean, dry, oil-free nails are the foundation of a lasting set. Prep takes about five minutes and decides how long your manicure survives.

Nail Bed Health Assessment
Before you cover anything, look at your natural nails. Check for peeling, ridges, or tender spots around the nail bed.
Cuticle Care and Surface Preparation
Wipe each nail with isopropyl alcohol after buffing. This removes the natural oils that weaken the adhesive bond.
Step 2: Size Each Press-On Nail Correctly
The right size covers your whole nail without touching your skin. Lay out all the press-ons and match each one to a finger before you glue anything.
Step 3: Press-On Nails Glue vs Sticky Tabs
Glue and adhesive tabs are not interchangeable, they bond differently, fail differently, and suit different situations. Pick based on how long you need the set to last and how much risk your natural nails can tolerate.
| Method | Wear Time | Bond Mechanism | Best For | Removal |
|---|---|---|---|---|
| Nail glue (cyanoacrylate) | 1-2 weeks | Cures into a hard polymer that fuses the press-on to the nail plate | Work weeks, events, workouts, swimming | Soak-off with acetone |
| Adhesive tabs (pressure-sensitive) | 1-3 days | Stays tacky and grips by pressure, not chemical cure | Trying a look, kids, quick swaps, sensitive nails | Peel off gently |
How Nail Glue Actually Bonds
Cyanoacrylate glue cures when it meets trace moisture on the nail plate. That cure is fast, often 5-15 seconds of firm pressure, and it is permanent until you dissolve it. This is why liquid glue gives you one shot at placement: once the polymer forms, repositioning tears the bond and the top layer of your nail with it.
How Adhesive Tabs Actually Bond
Tabs are pressure-sensitive adhesive, the same family of chemistry as a sticky note, just stronger. They stay tacky instead of curing, so you can lift and reposition a nail several times before you commit. The trade-off is that tacky adhesive creeps under heat and water. A tab set that survives a shower is doing well; a tab set that survives a hot bath usually is not.
The Safety Trade-Off Beginners Miss
Glue is the higher-risk option for your natural nails, and not only because of removal. Cyanoacrylate is a known skin sensitizer. Repeated skin contact, glue squeezing out at the cuticle or sidewalls, can trigger contact dermatitis, an itchy, red, sometimes blistering reaction that gets worse with each exposure. Once sensitized, you may react to any cyanoacrylate product, including medical skin glue.
If you do use glue:
Which Should You Choose?
- First set ever: tabs. You will make placement mistakes, and tabs forgive them.
- Week-long wear needed: glue. Tabs will not survive seven days of normal hand use.
- Nails already thin or peeling: tabs. Glue removal with acetone strips more of the nail plate.
- Kids and teens: tabs. Faster removal, no solvent, lower sensitization risk.
A common pattern is to keep both on hand: tabs for practice and short wears, glue for the sets you want to last.
Step 4: Apply Your Press-On Nails Without Bubbles
Bubbles come from air trapped between the nail and the adhesive. You prevent them with pressure and angle, not more glue.
Follow these steps:
- Apply a thin line of glue or press a tab onto the press-on.
- Hold the press-on at a 45-degree angle at your cuticle.
- Roll it down toward your free edge.
- Press firmly for 15-30 seconds.
- Hold the sidewalls down for a few extra seconds.
How to Make Press-On Nails Stay On Longer
Longer wear comes down to three habits: dry prep, correct sizing, and gentle daily care. Most sets that fail early failed at one of those steps.
- Wear gloves for dishes and cleaning
- Keep nails out of hot water for the first hour
- Avoid using nails as tools to open cans or peel labels
- Apply cuticle oil to the skin around nails, not the bond
- Press down any lifted edge right away
How to Remove Press-On Nails Without Damage
Never pry press-ons off dry. Pulling tears layers from the nail plate and leaves your natural nails thin, weak, and prone to peeling for weeks. The safe method depends on whether you used glue or tabs.
Removing Adhesive Tab Sets
Tabs are the easy case. Work slowly and let the adhesive release instead of fighting it.
- Warm a small bowl of water with a few drops of dish soap.
- Soak fingertips for 5-10 minutes until the adhesive softens.
- Slide a wooden orange stick or cuticle stick under one edge.
- Rock the stick gently side to side, do not lever upward.
- If the nail resists, soak another 5 minutes. Forcing it defeats the purpose.
- Peel any leftover adhesive off the press-on and set it aside for reuse.
Removing Glue-Bonded Sets
Glue requires acetone, and acetone is harsh. Keep the soak short and targeted.
- File the top surface of each press-on lightly to break the glossy seal, this lets acetone penetrate faster.
- Apply cuticle oil or petroleum jelly to the skin around each nail to create a barrier.
- Soak a cotton ball in 100% acetone and place it on the nail.
- Wrap the fingertip in aluminum foil to hold the cotton in place and trap fumes.
- Wait 10-15 minutes. Check one nail, if it has not released, rewrap and wait 5 more minutes.
- Use an orange stick to gently nudge the press-on off. Do not pull.
- Wash hands thoroughly with soap and water.
Troubleshooting Common Application Mistakes
Most beginner problems trace back to prep and pressure. Here are the fixes.
| Problem | Likely Cause | Fix |
|---|---|---|
| Nails pop off in a day | Oily nail plate | Wipe with alcohol before applying |
| Bubbles under the nail | Air trapped at application | Roll from cuticle at a 45-degree angle |
| Nail feels too tight | Wrong size | Size down and file the sides |
| Edges lift after washing | Water exposure early | Wear gloves and dry hands fully |
| Natural nails feel weak | Rough removal | Soak off instead of prying |
Frequently Asked Questions
What is the trick to getting press-on nails to stay on?
The trick is thorough nail prep. Buff your natural nail plate to remove shine, wipe with isopropyl alcohol or a nail dehydrator, and avoid touching the nail surface after cleaning. Use enough cyanoacrylate glue or adhesive tabs, press firmly for 30 seconds, and keep hands dry for the first hour. Skipping prep is the top reason press-ons pop off early.
Do I put nail glue on my natural nail or on the press-on?
Apply a thin line of glue or press a tab onto the press-on. Wait a few seconds for the glue to get tacky, then align the press-on at the cuticle and press down at a 45-degree angle to push out air bubbles and prevent lifting.
How do I choose the right size press-on nail?
Match the press-on to your widest nail, not the longest. The sidewalls should sit flush with your natural nail edges. If a press-on is too wide, it will lift at the sides. If it is too narrow, it will pop off under pressure. Most sets include multiple sizes; try each one before gluing. For children, look for sets labeled with small or child-specific sizing.
How long do press-on nails typically last?
With proper prep and glue, press-ons last 7 to 14 days. Adhesive tabs give 1 to 3 days and suit short-term wear. To extend wear time, avoid soaking hands in water, apply cuticle oil daily to keep the natural nail flexible, and press down any lifted edges immediately. Reusable sets can be worn multiple times if removed gently.