

Table of Contents
- Why Press-On Nails Pop Off (and What Actually Causes Lifting)
- How to Prep Nails for Press-Ons: The Step-by-Step Routine
- Best Glue for Press-On Nails: Brush-On, Squeeze, or Adhesive Tabs?
- How Long Do Press-On Nails Last? Realistic Wear Times by Activity
- Sealing the Edges and Building a Moisture Barrier
- Repairing a Single Lifted Nail Without Redoing the Whole Set
- Post-Application Care: Habits That Extend Manicure Longevity
- Frequently Asked Questions
Last Updated: September 12, 2026
Why Press-On Nails Pop Off (and What Actually Causes Lifting)
Most press-on failures trace back to one culprit: oil and moisture trapped between the artificial nail and your natural nail plate. Adhesive cannot bond to a wet, oily surface. This guide from Liquid Glamour Nails breaks down how to make press on nails stay on longer, starting with why they lift.
Press-on nails are pre-formed artificial nail covers that adhere to the natural nail using glue or adhesive tabs. Applied correctly to a properly prepped surface, they hold for one to two weeks; applied to unprepared nails, they pop off within hours (PubMed).
The Role of Oil, Moisture, and Curvature
Your natural nail plate produces sebum and holds moisture from handwashing, lotion, and humidity. That invisible film sits between the adhesive and the nail surface, weakening the bond from the moment you press down. Curvature mismatch compounds it: if the press-on's C-curve is flatter or deeper than your natural nail, the edges never fully contact the adhesive, creating gaps where lifting starts.
Application Errors That Cut Wear Time in Half
- Skipping the dehydrating step entirely
- Using too much or too little glue
- Pressing down for only a few seconds instead of holding firm
- Choosing a size that overlaps the cuticle or sidewalls
- Applying lotion or cuticle oil before the nails set
A common mistake is treating application like a sticker: peel, press, done. Press-ons need the same prep discipline a salon technician uses.
How to Prep Nails for Press-Ons: The Step-by-Step Routine
Prep takes about ten minutes and determines whether your set lasts two days or two weeks. Follow these steps in order.
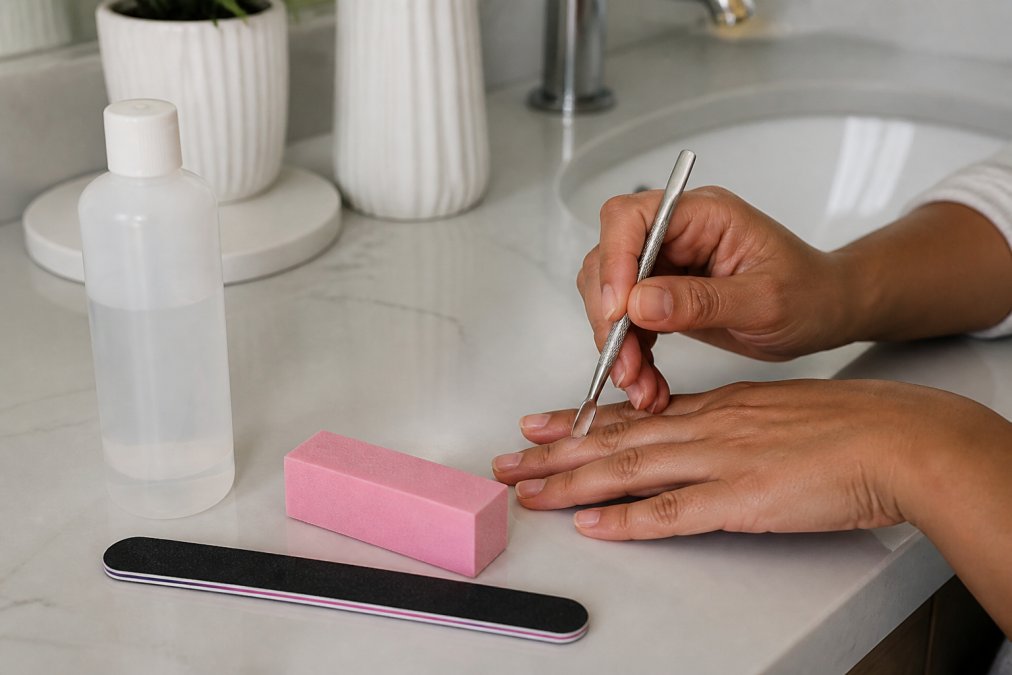
Cleaning, Dehydrating, and Buffing the Natural Nail Plate
- Wash hands with soap and water, then dry thoroughly.
- Push back cuticles gently with a cuticle pusher. Never cut them.
- Buff the nail surface lightly with a grit file or buffing block to remove shine, creating microscopic texture for the adhesive to grip.
- Wipe each nail with isopropyl alcohol or a nail dehydrator to strip remaining oils.
- Let nails air-dry completely before applying anything.
The dehydrating step is the one most people skip, and it is the single biggest reason press-ons lift early.
Cuticle Care and Sizing: Getting the Fit Right
Match each press-on to the widest part of your nail bed, not the cuticle line. A nail that touches the cuticle or sidewalls will lift at the edges within a day. If you are between sizes, size down. For narrow nail beds, check whether the set includes smaller sizes rather than forcing an adult fit.
Best Glue for Press-On Nails: Brush-On, Squeeze, or Adhesive Tabs?
Brush-on glue gives the most control and the strongest hold for most people. Squeeze tubes work fine but are easier to over-apply. Adhesive tabs are gentlest on nail health and easiest to remove, but typically last only a few days.
| Adhesive Type | Hold Time | Best For | Removal |
|---|---|---|---|
| Brush-on glue | 1-2 weeks | Long wear, active days | Acetone soak |
| Squeeze glue | 1-2 weeks | Full sets, backup use | Acetone soak |
| Adhesive tabs | 2-5 days | Sensitive nails, quick changes | Gentle peel |
Why the Chemistry Matters More Than the Brand
Nearly every press-on glue is a cyanoacrylate (CA) adhesive (PubMed). CA cures by reacting with trace moisture on the nail surface, which is why a bone-dry nail plate can cure too slowly, while an oily nail never cures at all. This explains two counterintuitive rules:
- Do not over-dehydrate with acetone right before gluing. Acetone strips oil but also pulls moisture out of the nail plate. If the nail is bone-dry, CA has nothing to react with and the bond stays tacky. Isopropyl alcohol (70% or higher) is the better final wipe because it removes oil while leaving enough ambient moisture for a fast cure.
- Ethyl cyanoacrylate cures faster and bonds more rigidly than methyl cyanoacrylate. Most cosmetic nail glues use ethyl CA. A rigid bond holds longer on stable nails but cracks under flex, which is why people with thin or flexible nails sometimes get better results from a slightly thicker gel-style glue or adhesive tabs.
Primer and pH Bonder Compatibility
A pH bonder (sometimes labeled "primer" or "nail prep") is an acidic solution, often methacrylic acid, that etches microscopic pores into the nail plate so the adhesive can mechanically lock in. It is not the same as a dehydrator, and the two are not interchangeable:
- Dehydrator removes surface oil and moisture. Use it first.
- pH bonder / primer creates texture and shifts the nail surface to a pH that accelerates CA cure. Use it second, and let it dry fully.
- Do not layer a primer under adhesive tabs. Tabs rely on pressure-sensitive adhesion, not chemical cure, and a primer can make the tab slide instead of grip.
Many technicians skip primer entirely on healthy nails and reserve it for nails that have lifted repeatedly in the same spot. Overusing acid primers can cause white spots and surface damage over time.
Viscosity, Nozzle Type, and Application Trade-offs
- Brush-on (low viscosity): Thin, flows into the C-curve, easiest to apply an even coat. Best for full sets and anyone who has struggled with squeeze tubes.
- Squeeze tube (medium-to-high viscosity): Thicker, fills gaps on flatter nails, but a single squeeze can flood the nail and prevent full contact. Wipe the nozzle and apply one small dot per nail.
- Adhesive tabs (pressure-sensitive): No cure time, no fumes, removable in seconds. Hold time drops sharply with handwashing, so tabs suit short events, sensitive or damaged nails, and frequent set changes.
Matching Adhesive to Nail Condition
| Nail Condition | Best Adhesive | Why |
|---|---|---|
| Healthy, firm nails | Brush-on ethyl CA glue | Fast cure, rigid long-wear bond |
| Thin or flexible nails | Gel-style glue or adhesive tabs | Flexes with the nail instead of cracking |
| Peeling or damaged nails | Adhesive tabs | No chemical cure, no additional stress |
| Oily nail beds | Brush-on glue + alcohol wipe + pH bonder | Bonder compensates for residual oil |
| Frequent set changes | Adhesive tabs | Removable without acetone |
FDA information on cosmetic nail product safety
How Long Do Press-On Nails Last? Realistic Wear Times by Activity
Expect one to two weeks with glue and proper prep, or two to five days with adhesive tabs. Activity level changes everything.
- Desk work and daily errands: 10-14 days
- Gym sessions and swimming: 5-10 days
- Heavy cleaning or dishwashing without gloves: 3-7 days
- Typing all day: 7-10 days
To make press on nails stay on longer through workouts, wear gloves for wet tasks and avoid soaking hands in hot water for long stretches.
Sealing the Edges and Building a Moisture Barrier
Press each nail down for 30 seconds, working from the center outward, then press the edges firmly. This seals the perimeter where lifting begins. A thin layer of clear top coat along the seam between the press-on and your natural nail adds a moisture barrier that keeps water from creeping underneath.
Repairing a Single Lifted Nail Without Redoing the Whole Set
One lifted nail does not mean a full redo, but a repair only holds if you fix the cause of the lift, not just the symptom. Popping the nail off and re-gluing it works about half the time; the rest of the time the same nail lifts again within a day because the underlying problem was never addressed.
Step 1: Diagnose Why It Lifted
Before you touch the nail, look at where the lift started:
- Lifted at the cuticle line: Almost always a sizing or prep issue, the press-on was too wide, too narrow, or the cuticle area was not fully dehydrated. Re-gluing without resizing will fail again.
- Lifted at a sidewall: The C-curve does not match your natural nail's curvature, so the edge never made full contact. This is the most common cause of repeat pop-offs on the same finger.
- Lifted at the free edge (tip): Usually mechanical, you used the nail as a tool or the tip caught on something. Easiest repair, most likely to hold.
- Lifted across the whole nail at once: Adhesive failure from oil or moisture. The entire nail needs to come off and the natural nail needs a full re-prep.
Step 2: Remove the Lifted Nail Without Damage
Do not pry the nail off dry, that pulls layers off the natural nail. Instead:
- Soak a cotton ball in acetone and hold it against the lifted edge for 30-60 seconds.
- Slide a cuticle stick under the loosened edge and work it gently toward the center. Stop if you feel resistance.
- Once the nail releases, wipe the natural nail and the underside of the press-on with isopropyl alcohol to remove old adhesive residue.
- If glue remains stuck to the natural nail, buff it lightly with a fine-grit file, do not pick at it.
Step 3: Re-Prep Only the Affected Nail
You do not need to redo the whole set, but you do need to redo the full prep on this one nail:
- Buff the natural nail surface lightly to remove shine and any leftover glue.
- Wipe with isopropyl alcohol and let it air-dry for a full 60 seconds.
- If the nail lifted at the cuticle or sidewall, re-check the size. Size down if the press-on overlaps the cuticle or sidewalls.
- If the C-curve is the problem, warm the press-on with a hair dryer on low for 5-10 seconds and press it against your natural nail to soften and reshape the curve before gluing, a technician trick most at-home guides skip.
- Apply a thin, even layer of glue to the natural nail and a small dot to the press-on. Press from the cuticle outward and hold for a full 30 seconds.
Step 4: When to Give Up and Redo the Whole Set
A single-nail repair is worth doing when:
- The lift started at the free edge or tip
- The natural nail underneath is intact and not peeling
- The press-on itself is not cracked or warped
Redo the whole set instead when:
- Two or more nails have lifted in the same week
- The lifted nail is the third or fourth on the same hand to pop off
- The natural nail underneath is thin, peeling, or painful
- The press-on has lost its shape or the C-curve has flattened
The Quick-Fix Kit to Keep Handy
A small repair kit in your bag or desk drawer turns a 20-minute redo into a 5-minute fix:
- One or two spare press-ons in your most-used sizes
- A mini brush-on glue (the brush applicator is faster than a squeeze tube for single nails)
- An alcohol wipe or a small vial of isopropyl alcohol
- A cuticle stick
- A fine-grit buffer
Post-Application Care: Habits That Extend Manicure Longevity
Small daily habits add days to your wear time. Keep a cuticle stick nearby to press down edges after handwashing. Wear gloves for dishes and cleaning. Avoid using nails as tools to open cans or peel labels. Reusable press-on sets can be cleaned and reapplied, so a little care now means more wears per set.
Frequently Asked Questions
How do I keep my press-on nails from falling off?
Start with a clean, dry nail bed. Push back cuticles, buff the natural nail plate lightly with a grit file, and wipe each nail with isopropyl alcohol to remove oils. Choose the right adhesive for your lifestyle: cyanoacrylate glue for maximum hold or adhesive tabs for gentler wear. Press each nail down firmly for 30 seconds, starting from the cuticle and sealing the edges. Avoid water for the first hour after application to let the bond fully cure.
How to make press-ons last 3 weeks?
Three weeks is achievable with a strict prep routine and post-application care. Dehydrate the nail surface, match the press-on size to your nail shape and curvature, and use a quality nail glue rather than tabs. Seal the edges with an extra dab of glue or a clear top coat. Wear gloves for dishes and cleaning, keep nails oil-free, and avoid using them as tools. If one lifts, repair it immediately to prevent moisture from loosening the rest.
Why do my press-on nails keep popping off?
The most common causes are oil and moisture on the natural nail, poor sizing, and not buffing the nail surface. If the press-on is too small or too large, the bond cannot form properly. Curvature mismatch also causes lifting at the edges. Fix these by prepping with a dehydrator, choosing the closest size, and gently bending the press-on to match your nail's curve. Pressing firmly for 30 seconds and avoiding water for an hour after application makes a noticeable difference.
Should I use glue or adhesive tabs for longer wear?
For the longest wear, brush-on or squeeze-on cyanoacrylate glue outperforms adhesive tabs. Glue creates a stronger bond that resists water exposure and daily activity, often lasting 1 to 2 weeks or more. Adhesive tabs are better for short-term wear, sensitive nails, or reusable sets you want to swap frequently. If you choose tabs, press them firmly and avoid moisture for several hours. Many people use glue for everyday wear and keep tabs for special occasions or quick changes.
Press-ons that lift early almost always point back to prep, not product. Liquid Glamour Nails offers reusable, salon-quality press-on sets designed for busy schedules, with sizing options for adults, teens, and children, plus designs that hold up to real life. Get started with Liquid Glamour Nails and enjoy a polished, long-lasting manicure without the salon visit.