

Table of Contents
- Can You Wear Press On Nails for Damaged Nails?
- How to Keep Press-On Nails From Damaging Natural Nails
- Press-On Nail Glue vs Adhesive Tabs: Which Is Safer for Damaged Nails?
- How to Remove Press-On Nails Safely
- How Long to Wear Press-On Nails on Damaged Nails
- Aftercare and Recovery Between Wears
- Choosing the Right Press-On Nails for Damaged Nails
- Frequently Asked Questions
Last Updated: October 7, 2026
Can You Wear Press On Nails for Damaged Nails?
Yes, you can wear press on nails for damaged nails, but only when the damage is mild and the nail plate is still intact.
Press-on nails are pre-formed nail tips with a finished design that attach to your natural nails using adhesive tabs or nail glue. They require no filing of the nail plate and no curing lamps.

Press-ons are gentler than acrylics, but they still cover the nail and trap moisture underneath, so the state of your nails decides whether you should wear them at all.
When to Avoid Press-Ons Entirely
Skip press-ons if your nails show signs of infection or structural collapse. Covering a problem hides it and can make it worse.
Do not apply press-ons when you notice:
- Green, yellow, or black discoloration on the nail plate
- Thickening, crumbling, or separation of the nail from the nail bed
- Pain, swelling, or heat around the cuticle
A green tint often signals a bacterial or fungal issue that thrives in dark, moist spaces. A press-on creates exactly that environment. If you see any of these signs, leave the nail uncovered and see a healthcare provider before your next manicure.
How to Keep Press-On Nails From Damaging Natural Nails
The damage from press-ons rarely comes from the product itself, it comes from how you prep, apply, and remove them. Thin and fragile nails suffer most when someone pries a set off dry or files the surface first.
Here is how we tell customers to protect the nail plate:
- Skip the buffer. You do not need to rough up the nail surface for adhesive tabs, and glue grips fine on a clean, dry nail.
- Push back cuticles gently with a cuticle stick after a shower, when skin is soft. Never cut them.
- Dehydrate, don't strip. Wipe each nail with alcohol to remove oils. This improves adhesion without thinning the nail.
Press-On Nail Glue vs Adhesive Tabs: Which Is Safer for Damaged Nails?
Adhesive tabs are safer for damaged nails because they release with warm water and light lifting, while nail glue forms a harder bond that demands more force to break.
Glue holds longer, often a week or more, but when the bond fails it fails suddenly and the temptation to pry is high. Tabs give a few days of wear and come off cleanly.
| Factor | Adhesive Tabs | Nail Glue |
|---|---|---|
| Wear time | 2-4 days | 5-10 days |
| Removal difficulty | Low, soak and lift | High, needs patience |
| Risk to thin nails | Lower | Higher if rushed |
| Best for | Weekend wear, fragile nails | Events, healthy nails |
| Reusability | High, nails stay intact | Moderate |
Adhesive Choice by Nail Condition and Wear Time
Match the adhesive to your nail condition first, then to wear time.
- Severely damaged or peeling nails: adhesive tabs only, and keep wear short.
- Thin nails with no active damage: tabs for daily wear, glue for a single special occasion.
- Healthy nails, long event: glue is reasonable, but plan a proper soak-off.
Our reusable press-on sets ship with both adhesive tabs and nail glue included, so you can choose per wear instead of committing to one method.
How to Remove Press-On Nails Safely
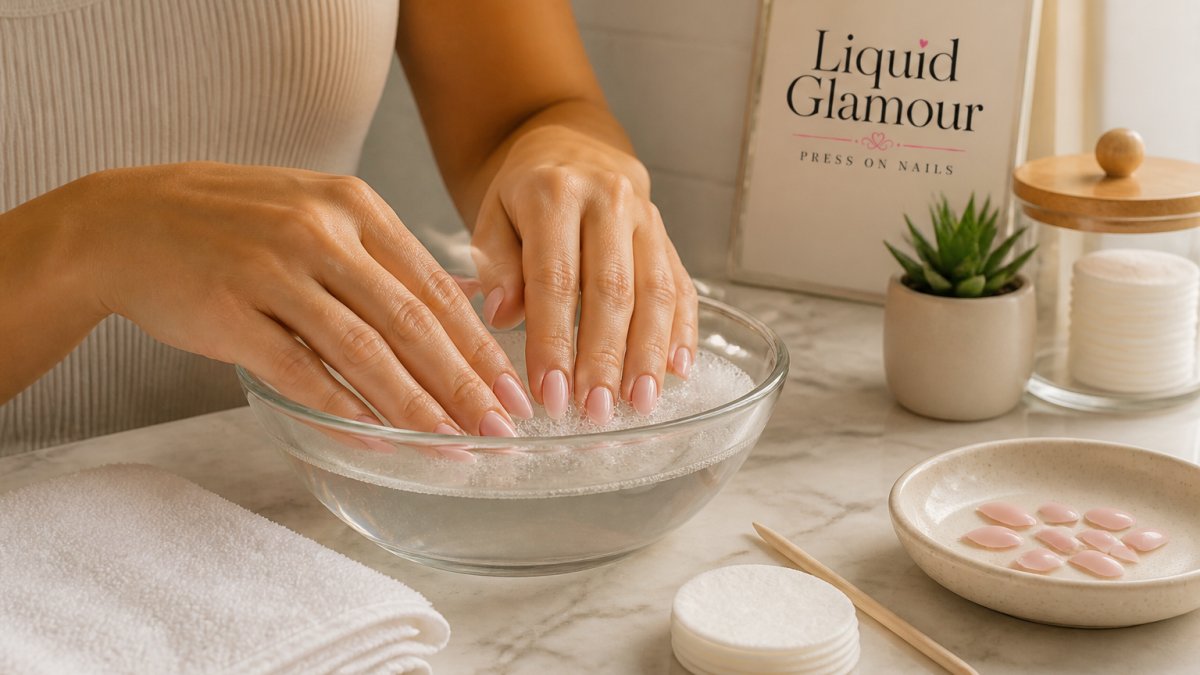
Safe removal starts with water, not force. Let the adhesive release on its own so the press-on slides off instead of taking a layer of nail plate with it, rushed removal, not the press-on itself, causes the white, flaky patches and thinning people blame on the product.
The Safe Removal Sequence
- Soak first, always. Fill a small bowl with warm, not hot, water and a drop of dish soap. Soak fingertips 10 to 15 minutes; hot water dries out the nail plate.
- Add oil for glue bonds. If the set was applied with nail glue, warm water alone often is not enough. Work cuticle oil or petroleum jelly under the free edge and let it sit for 2 to 3 minutes.
- Work one nail at a time. Slide a wooden cuticle stick or plastic orange stick under the edge at a shallow angle, applying gentle, steady pressure, never a quick pry.
- Re-soak instead of forcing. If a nail resists, soak another 3 to 5 minutes. Adhesive softens in stages, so a second soak does what force would damage.
- Lift, don't twist. Once the tip loosens, lift it straight up and away from the nail bed, twisting or rocking side to side pulls nail layers apart.
- Clean up residue gently. Rub off leftover adhesive with a soft cloth and a little oil. Do not scrape it with a metal tool or a file.
What Not to Do
These moves turn removal into a setback:
- Do not peel or pick at a set that is still bonded. Dry peeling is the most common cause of thin, flaky nails after press-ons.
- Do not bite or chew tips loose. It applies uneven force and often tears the free edge.
- Do not use acetone on damaged nails. Acetone strips oils from an already fragile nail plate and can worsen peeling and brittleness. Reserve it for healthy nails on gel or acrylic.
Check Your Nails After Every Removal
Removal is your best chance to inspect the nail plate. Once the set is off, look at each nail in good light:
- White patches or visible flaking mean layers came off with the adhesive. Leave nails bare and moisturize until the surface looks smooth again.
- A bendy, flexible feel signals thinning. Skip glue next wear and keep the set short, or take a full rest period.
- Ridges, dents, or a rough surface usually reflect pressure from an oversized or poorly fitted tip, not the adhesive. Re-check sizing before the next application.
How Long to Wear Press-On Nails on Damaged Nails
Keep press-ons on damaged nails no more than three to four days per wear. Healthy nails can handle a week or more, but fragile nails need air and moisture balance to recover.
The longer a set stays on, the more moisture builds between the press-on and the natural nail, leading to lifting, discoloration, and sometimes fungal overgrowth. For thin or peeling nails, short wears with real breaks are the difference between a protective manicure and a setback.
Aftercare and Recovery Between Wears
Recovery time is what most guides skip, and it is where damaged nails actually heal. A press-on covers the nail, so the plate gets no air or moisture exchange while a set is on. The rest window between wears is not downtime, it is the treatment.
How Long to Rest Between Sets
Use the condition of your nails, not the calendar, to set the rest period:
- Mild damage (slight peeling, occasional snag): 2 to 3 bare days between wears.
- Moderate damage (thin, bendy, visible flaking): 1 to 2 weeks bare, with daily moisturizing.
- Damage from gel or acrylic removal: 2 to 4 weeks bare before any press-on goes back on.
A rhythm many of our customers use: wear a set for a long weekend, remove it, and leave nails bare at least two days before the next application. If nails still look thin or flaky, extend the break rather than pushing through.
The Between-Wear Routine
What works between sets:
- Moisturize daily. A cuticle cream or oil keeps the nail plate flexible and less prone to peeling. Apply it at night so it has hours to absorb.
- Keep nails short and filed smooth to prevent snags that tear thin edges. File in one direction rather than sawing back and forth.
- Wear gloves for dishes and cleaning. Water and detergent strip oils fast, and rubber gloves do more for nail recovery than most products.
Warning Signs That Mean Stop and Get Advice
Moisture trapped under a press-on creates a warm, dark space where bacteria and fungus grow. Watch for these signs:
- Green, yellow, or black discoloration on the nail plate, often a sign of a bacterial or fungal issue.
- Thickening, crumbling, or the nail lifting away from the nail bed.
- Pain, swelling, heat, or redness around the cuticle or side of the nail.
If any of these appear, leave the nail uncovered and see a healthcare provider before your next manicure.
When to Pause Press-Ons Entirely
Press-ons suit mild damage, but they are not the right tool for every nail. Pause them and let the nail recover, or get professional advice, when you see:
- Structural collapse, where the nail is crumbling or partially detached.
- Repeated thinning that does not improve after a full rest period.
- Any sign of infection, including discoloration, pain, or swelling.
The honest rule: if you would not feel comfortable showing the bare nail to a dermatologist, do not cover it with a press-on. Treat the nail first, then come back to press-ons when the plate is intact.
Choosing the Right Press-On Nails for Damaged Nails
The best press-ons for damaged nails are short, lightweight, and shaped to sit flat without lifting at the edges. Short square and squoval shapes distribute pressure more evenly than long almond or stiletto styles, which act like levers on a fragile nail.
Look for these features:
- Short length to reduce torque on the nail bed
- Ultra-thin fit so the tip follows the natural curve instead of fighting it
- Smooth, chip-resistant finish that does not need filing to look finished
- Reusable construction so you are not repurchasing constantly
Product Picks for Fragile or Thin Nails
Our Essential Solid Short Square Press-On Nails are the set we recommend most for damaged nails.
For a barely-there look on thin nails, the Natural Soft Pink Squoval Solid set is a strong second option.

Damaged nails do not have to mean months without a manicure. They do mean choosing short, lightweight press-ons, using adhesive tabs when your nails are fragile, and committing to a real recovery window between wears.
Frequently Asked Questions
Can you wear press-on nails if your natural nails are weak or peeling?
Yes, but with care. Weak or peeling nails can still wear press-ons if you use adhesive tabs instead of glue, keep the wear short (3 to 5 days), and never file the nail surface. Choose a flexible, ultra-thin press-on like Liquid Glamour Nails' Natural Soft Pink Squoval Solid, which bends with the nail rather than pulling on it. Stop if you feel tenderness or see the nail bending under the press-on.
Should you use nail glue or adhesive tabs on damaged nails?
For damaged nails, adhesive tabs are the safer default. They release with gentle pressure, so there is no acetone soak or prying. Nail glue requires more aggressive removal, which can peel already thin nails.
How do you remove press-on nails without damaging your nails?
Soak fingertips in warm soapy water for 10 to 15 minutes, then use a wooden cuticle stick to gently work under the edge of each press-on. Never bite, pick, or pry them off dry. For glue-applied nails, apply a drop of cuticle oil or acetone-free remover at the edge and wait 2 minutes before nudging. After removal, apply cuticle oil and let nails rest for at least 24 hours.
When should you avoid wearing press-on nails?
Skip press-ons if you have redness, swelling, pus, a dark spot under the nail, or a nail that is lifting from the nail bed. These signs can point to infection or fungal overgrowth and need a doctor's care, not a cover-up. Also avoid press-ons on nails with deep horizontal ridges or active peeling, since adhesion will fail and removal can tear the nail further.