

Table of Contents
- How to Prep Nails for Press Ons for Maximum Wear
- Choosing the Best Glue for Press On Nails
- Application Technique: Sealing the Edges to Prevent Lifting
- Troubleshooting Press On Nails Popping Off
- Aftercare and Maintenance for Manicure Longevity
- Safe Removal Without Damaging Your Nails
- Conclusion
- Frequently Asked Questions
Last Updated: September 25, 2026
How to Prep Nails for Press Ons for Maximum Wear
Learning how to make press on nails last longer starts with one truth: prep decides everything. Most press-ons that pop off within a day or two fail because of oil, moisture, or a poor fit, not weak glue. This guide walks through the full prep routine, from dehydrating the natural nail plate to sealing the edges, so your manicure survives meetings, gym sessions, and everyday life.
Cleaning and Dehydrating the Natural Nail Plate
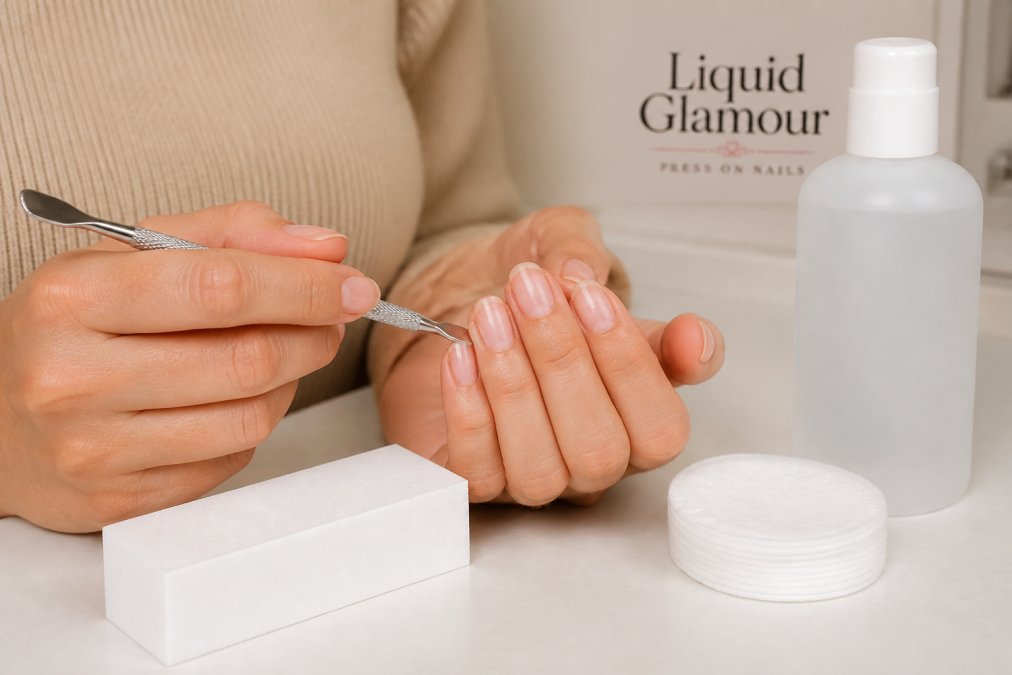
The natural nail plate holds a thin layer of oil that blocks adhesion. Remove it and glue grips far better.
- Wash and dry hands at least 30 minutes before you start
- Push back cuticles, never cut them
- Wipe every nail with isopropyl alcohol or a dehydrator
- Let nails air-dry fully before the next step
Buffing and Sizing for a Flush Fit
Buffing creates a slightly rough surface so glue can grip. Use a fine buffing block and lightly scuff the top of each nail. Stop once the shine is gone. Over-buffing thins the nail and causes damage.
- Match width first, then check the c-curve
- If you're between sizes, size down and file the sides
- For small hands or children, choose a set with smaller size ranges
- Test the fit dry before any adhesive touches your nails
Choosing the Best Glue for Press On Nails
The best glue for press on nails depends on two things most guides skip: how the adhesive actually bonds, and how your nail bed is shaped. Get both right and you stop fighting lifting all week.
How the Two Adhesive Types Actually Bond
Cyanoacrylate glue, the liquid glue in most press-on kits, works through a chemical reaction. When it meets trace moisture on the nail plate, it polymerizes into a rigid plastic bond. That's why a completely bone-dry nail can actually bond worse than one with a whisper of moisture, and why over-dehydrating with repeated alcohol wipes can backfire. The bond is strong but rigid, so it handles water and daily wear well and typically holds 5-10 days with good prep.
| Adhesive Type | Bond Mechanism | Typical Wear Time | Best For | Removal |
|---|---|---|---|---|
| Cyanoacrylate glue | Chemical (moisture-cured polymerization) | 5-10 days | Work weeks, events, gym use, curved beds | Acetone or warm-water soak |
| Adhesive tabs | Mechanical (pressure-sensitive) | 1-2 days | Quick looks, sensitive nails, kids, flat beds | Peels off by hand |
Matching Adhesive to Your Nail Bed Shape
Nail beds vary more than most people realize, and the shape, not the brand, decides which adhesive holds. Look at your bare nails from the side and from the tip:
-
Flat nail beds: little to no sidewall curve. Tabs and glue both work; tabs are the gentler daily option.
-
Curved or arched beds: the nail wraps around the finger. Tabs can't flex with that curve, so they lift at the sidewalls within a day. Use glue and press the sides down firmly.
-
Wide beds with narrow free edge (fan-shaped): size down and file the sides, then glue, a too-wide press-on touches skin and lifts at the cuticle line.
-
Narrow beds with wide free edge (tapered): glue works, but add a small bead along the side edges to seal the gap.
-
Oily or thin/damaged beds: oily beds need a full dehydrating prep plus glue; thin or damaged beds (common after years of gel manicures) do better with tabs or a gentler glue, since strong cyanoacrylate on a weakened nail can peel layers.
-
Flat beds: glue or tabs
-
Curved or arched beds: glue, sealed at the sidewalls
-
Thin or damaged nails: start with tabs
-
Oily beds: glue, after full dehydration
-
Between sizes: size down and file the sides
Application Technique: Sealing the Edges to Prevent Lifting
Lifting starts at the edges, so sealing them is the single most important step in press-on application. Apply a thin line of glue to your natural nail and a small dot on the inside of the press-on. Press down at a 45-degree angle from cuticle to tip, then hold firm for 30 seconds. This pushes out air bubbles that cause lifting.
- Use a thin layer, not a thick blob
- Press from cuticle to tip, not straight down
- Hold each nail for 30 seconds
- Seal the sides and free edge last
Troubleshooting Press On Nails Popping Off
Press-ons pop off for predictable reasons, but the fix depends on where the failure starts and what your hands do all day. Diagnose before you reapply, or you'll repeat the same failure.
Diagnose by Failure Pattern
- Popping off within hours, all ten nails: oil or moisture left on the nail plate. Redo the dehydrating step and wait 30 minutes after washing hands.
- Lifting at the cuticle line: the press-on was placed too close to the skin, or sized too wide so it touches skin and rocks. Size down and file the sides.
- Lifting at the tip/free edge: not enough glue near the free edge. Add a small dot there before pressing.
- Lifting at one sidewall only: that nail bed is more curved than the rest. Add a tiny bead of glue along that sidewall and press for 10 extra seconds.
- One nail keeps failing no matter what: that nail is likely a different shape than its neighbors, flatter, more curved, or wider. Re-size it independently instead of forcing the same size as the matching finger.
- Nails shift or twist during activity: tabs can't handle torque. Switch to glue and seal the edges before gym, dishes, or heavy work.
Activity-Specific Durability
Wear time isn't one number, it's a function of what your hands do. Match your adhesive and sealing routine to your day:
- Office/desk work (typing, mouse): the risk is edge-peel from repeated keystroke friction on the tips. Glue plus a sealed free edge handles this; tabs usually survive a workday but not a workweek.
- Manual work (gardening, cleaning, cooking): water and chemicals are the enemy. Glue, seal all edges, and wear gloves for wet tasks. Expect to lose a nail if you skip gloves during a long dish session.
- Gym and swimming: repeated water immersion breaks down even good glue over several sessions. Re-seal edges after each swim, and avoid tabs entirely.
- Caregiving or childcare (frequent hand-washing, lifting): high moisture plus torque. Glue, sealed edges, and a mid-week edge check.
- Cold/dry climates: nails and glue get brittle; a thin layer of cuticle oil on the surrounding skin (never the nail edge) helps prevent micro-cracking.
The Mid-Week Edge Check
Most failures announce themselves 12-24 hours before the nail actually pops. Once a day, press each nail's edges down firmly. If you feel any give at a sidewall or the free edge, add a tiny dot of glue with a toothpick and press for 30 seconds. Catching a lift early is the difference between a 5-day set and a 10-day set.
Aftercare and Maintenance for Manicure Longevity
Aftercare protects your work. Keep hands out of water for the first few hours after application so the glue can fully cure. Wear gloves for dishes and cleaning. Hot water and harsh cleaners break down adhesive faster than anything else.
- Wear gloves for dishes, cleaning, and gardening
- Avoid soaking hands for long periods
- Keep oils and lotions off the nail edges
- Check edges weekly and press down any lifting early
Safe Removal Without Damaging Your Nails
Safe removal protects your natural nails so you can reuse your press-ons again. Never rip or pry them off. That tears the top layer of the nail and leaves it thin and weak.
- Soak in warm soapy water or acetone
- Wiggle from the side, never pry from the tip
- Clean off all adhesive residue
- Apply cuticle oil and let nails rest
Conclusion
Press-ons that last aren't about luck. They're about dry nails, the right adhesive, a snug fit, and sealed edges. Follow the prep routine above and you'll stop losing nails mid-week.
Frequently Asked Questions
How do I stop my press-on nails from popping off?
Most press-on nails pop off because of oil or moisture on the natural nail plate. Start with a prep routine: push back cuticles with a cuticle pusher, buff the nail surface lightly with a buffing block, then wipe each nail with isopropyl alcohol or a nail dehydrator. Choose the right size so the press-on covers the full nail bed without overhang, then apply a thin, even layer of cyanoacrylate glue and press firmly for 15 to 20 seconds, especially along the edges.
Does buffing your natural nails help press-ons stay on longer?
Yes. Lightly buffing the natural nail plate with a buffing block removes shine and creates a slightly textured surface that helps cyanoacrylate glue grip better. Keep it gentle: you are scuffing the surface, not thinning the nail. Over-buffing weakens the nail and can cause peeling. After buffing, always wipe away dust with isopropyl alcohol or a nail dehydrator so no residue sits between the nail and the adhesive.
What is the best adhesive for long-lasting press-on nails?
For the longest wear time, cyanoacrylate nail glue outperforms adhesive tabs, especially for active wearers. Adhesive tabs are easier to remove and better for short-term use, but they lift faster when exposed to water or sweat. If you want press-ons to survive gym sessions, hand washing, and daily typing, use a brush-on or gel-style cyanoacrylate glue. Some prep routines also include a bonding agent applied before the glue to improve adhesion on smooth or oily nail beds.
How long do press on nails usually last?
With proper nail prep, correct sizing, and cyanoacrylate glue, most press-on nails last 7 to 14 days. Wear time depends on your activity level, how much your hands are in water, and how well you sealed the edges during application. Adhesive tabs typically last 1 to 3 days. To extend wear, avoid soaking your hands, wear gloves for dishes and cleaning, and keep cuticle oil away from the glued edges, since oil breaks down the adhesive bond.