

Table of Contents
- How to Remove Press-On Nails Safely: What You'll Need Before You Start
- Step-by-Step: How to Remove Press-On Nails with Glue
- How to Remove Press-On Nails Without Acetone
- Press-On Nail Removal Tools: What to Use and What to Avoid
- How to Reuse Press-On Nails After Removal
- Aftercare for Natural Nails: Keeping Them Healthy
- Safety Warnings and Troubleshooting
- Conclusion
- Frequently Asked Questions
Last Updated: October 15, 2026
How to Remove Press-On Nails Safely: What You'll Need Before You Start
Learning how to remove press on nails safely starts with one simple rule: never pull. Press-on nails are a fast, affordable way to get a salon-quality manicure at home. The removal process matters just as much as the application, because rough removal is what causes most nail damage.
A safe removal protects your natural nails so you can reapply your next set without waiting weeks for damage to grow out.
Gathering Your Supplies
A common mistake is starting removal with bare hands and hope. Gather everything first, so you are not scrambling mid-soak.
- A small bowl of warm water
- Mild soap or a few drops of cuticle oil
- A wooden cuticle stick or orange stick
- A soft nail brush
- A clean towel
- Acetone or nail polish remover (only if needed)
- Cotton balls and foil (for glue-on nails)
Preparing Your Nails for Removal
Before you soak, check each nail for lifting. If a nail has already loosened, it will come off faster. Trim any long tips with a nail clipper to reduce snagging. Work over a towel so dropped nails do not fly across the room.
Set aside 15 minutes. Rushing is how people pry and peel. Give the process time and your nail plate will thank you.
Step-by-Step: How to Remove Press-On Nails with Glue
Removing glue-on nails takes patience, not force. The glue needs time to soften before the nail will lift cleanly. Follow these steps in order.
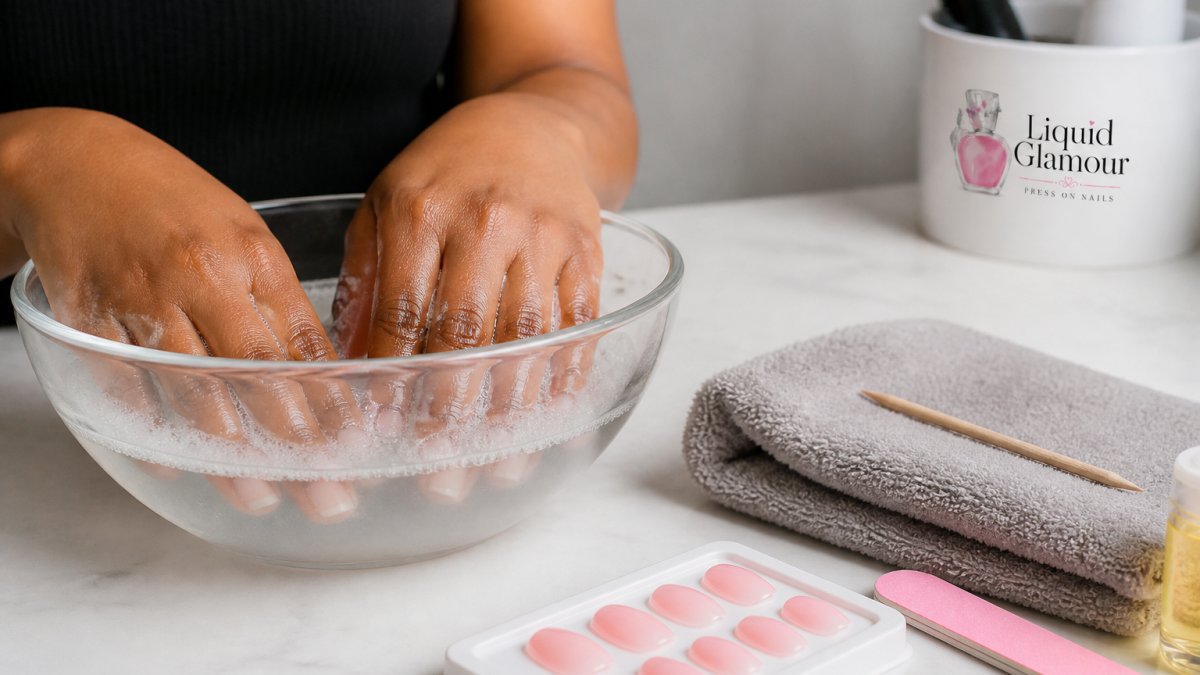
Step 1: Soak in Warm, Soapy Water
Fill a bowl with warm water and add mild soap. Soak your fingertips for 10 to 15 minutes. The warm, soapy water works into the glue and softens the bond.
For stubborn glue, add a few drops of oil to the water. Oil breaks down adhesive over time. Keep the water warm, not hot, so you do not burn your skin.
Step 2: Gently Loosen and Lift the Nail
After soaking, dry your hands. Slide a wooden cuticle stick under the edge of one nail. Gently lift and wiggle. If the nail does not move, soak again for 5 more minutes.
Never pry with force. If you feel pulling on your natural nail, stop. A little patience now prevents breakage later.
Step 3: Remove Leftover Adhesive or Glue
Once the nail is off, you will likely see residual glue on your nail plate. Buff it lightly with a soft file. A nail brush with soapy water removes sticky glue residue.
For tough spots, dab a cotton ball with acetone and press it on the nail for 30 seconds. Wipe away the softened adhesive.
How to Remove Press-On Nails Without Acetone
Acetone is the fastest solvent for nail glue, but it is also the harshest thing most people put on their hands. It strips lipids from the nail plate and the surrounding skin, which is why repeated acetone soaks leave nails looking chalky and cuticles feeling tight. If your press-ons were applied with adhesive tabs, or with a light layer of glue, you can usually skip acetone entirely.
Match the Method to the Adhesive
| Adhesive Type | Best Acetone-Free Method | Realistic Soak Time |
|---|---|---|
| Adhesive tabs | Warm water alone | 5 to 10 minutes |
| Light nail glue (one thin layer) | Warm water plus a few drops of oil | 10 to 15 minutes |
| Heavy nail glue (multiple layers or a full-cover glue) | Warm water plus oil, repeated soaks | 15 to 25 minutes, often in two rounds |
| Gel-style or UV-cured adhesive | Acetone is usually required | 20 to 30 minutes with acetone |
If you are not sure which adhesive you used, start with the gentlest method and escalate. There is no penalty for soaking twice. There is a real penalty for prying.
Using Oil and Warm Water
Warm water and oil are the safest combination for light glue and tabs.
Soak for 15 minutes, then test one nail. Slide a wooden cuticle stick under the side edge and apply light upward pressure. If the nail lifts without resistance, continue.
A common pattern is that the first nail takes the longest and the rest come off faster, because the water stays warm and the oil has already begun working on the adhesive.
Removing Nails Attached with Adhesive Tabs
Adhesive tabs are the easiest to remove and the least damaging to your natural nail. These press-on adhesives are designed for short wear, often a day or two, and they release with water alone.
Soak your hands in warm water for 5 to 10 minutes. The tab softens fast. Gently peel the nail from the side, working toward the center rather than pulling straight up.
When Acetone Is Still the Right Call
If you used a heavy glue, a gel-style adhesive, or a full-cover glue application, acetone-free methods may take 30 minutes or more and still leave adhesive behind. In that case, acetone is not the enemy, uncontrolled scraping is.
To reduce dryness afterward, rinse with warm water, pat dry, and apply cuticle oil immediately. A single acetone session with prompt oiling is far less damaging than three failed water soaks followed by a metal tool.
Press-On Nail Removal Tools: What to Use and What to Avoid
The right tools make removal safe and quick. The wrong ones cause nail damage you will spend months fixing.
| Tool | Use It For | Avoid If |
|---|---|---|
| Wooden cuticle stick | Gently lifting edges | Never use metal |
| Soft nail brush | Clearing glue residue | Skip if nails are thin |
| Cotton balls and foil | Acetone soak for glue | Avoid on dry, cracked skin |
| Cuticle oil | Softening adhesive | None, always safe |
| Metal pusher or file | Not recommended | Can scrape the nail plate |
How to Reuse Press-On Nails After Removal
Reusable press-on nails can last several wears if you clean them properly. This is where the value of a good set really shows.
Peel off any residual glue or adhesive tab from the back of the nail. Wipe the inside with a cotton ball dipped in acetone or nail polish remover.
Store them back in their original tray or a small case. Keep them away from heat and direct sun.
Aftercare for Natural Nails: Keeping Them Healthy
Aftercare is the part almost every removal guide skips, and it is the part that determines whether your next set goes on smoothly or sits on a damaged nail plate. Glue and acetone both strip moisture. The nail plate is made of keratin, and when it loses oil and water it becomes brittle, peels in layers, and bends instead of flexing. The goal of aftercare is to restore that moisture balance and protect the nail while it recovers.
The First 24 Hours
Rinse your hands with warm water to remove any residual solvent or adhesive. Pat dry, do not rub, because the nail plate is more fragile right after removal.
Keep your nails bare for at least 24 hours. No polish, no base coat, no new press-ons. This gives the nail plate time to reabsorb oil before it is sealed under another layer.
The First Week
- Apply cuticle oil two to three times a day, including after every hand wash.
- Use a thick hand cream or a balm at night, then put on cotton gloves if your nails are very dry.
- Keep nails filed short and rounded. A shorter free edge is less likely to catch and tear while the nail is still recovering.
- Skip acetone-based polish remover entirely for at least seven days.
- Avoid using your nails as tools, opening cans, scraping labels, prying lids.
A common pattern is that nails feel normal by day three but are still weak underneath. Give them the full week.
What to Do If Your Nails Are Already Damaged
If your nails look thin, have white spots, or peel in layers, they need more than oil. Trim them short and let the damaged area grow out.
If a nail is torn or cracked, keep it filed smooth and cover it with a breathable bandage if it snags on fabric. Do not glue the tear back together with nail glue; that traps moisture and can lead to infection.
When to Give Your Nails a Longer Break
If you see redness, swelling, or pain around the nail, or if the nail itself is lifting from the nail bed, stop applying press-ons and give the nail several weeks to recover.
Most people can reapply press-ons after about a week of consistent oiling, provided the nails feel firm and look even. If they still bend easily or look chalky, wait another week.
Safety Warnings and Troubleshooting
Most removal problems come from rushing. Here is how to handle the common ones.
The nail will not budge. Soak longer. Fifteen minutes is a guideline, not a limit.
It hurts when you lift. Stop immediately. Pain means the adhesive is still bonded to your nail plate.
Your nail bends or tears. This signals too much force. Trim the torn edge and moisturize.
Skin around the nail is red or sore. Take a break from press-ons.
Conclusion
Removing press-on nails does not have to cost you your natural nails. Soak in warm, soapy water, lift gently, and clean off leftover adhesive. That is the whole method. Skip the prying, and your nails stay strong for your next set.
At Liquid Glamour Nails, we design our reusable press-on nails for easy application and gentle removal. Our sets come in sizes for adults, teens, and children, with salon-quality designs you can wear again and again.
Frequently Asked Questions
What will remove press-on nails?
Warm, soapy water is the safest starting point for removing press-on nails. Soak your fingertips for 10 to 15 minutes, then gently lift the edges with a cuticle stick. If the nails were attached with glue, you may need a few drops of acetone or cuticle oil along the edges. For adhesive tabs, warm water alone often loosens them enough to peel off without force. Never pull or pry, as that can damage your natural nails.
Can hot water take off fake nails?
Hot water can help soften the adhesive on fake nails, but it should not be scalding. Use warm water, not boiling, to avoid burning your skin. Soak for 10 to 15 minutes. If the nails do not loosen, add a drop of dish soap or a few drops of oil. For glue-on nails, you may need to follow up with acetone or a dedicated remover. Always test the water temperature on your wrist first.
Do press-on nails damage your nails?
Press-on nails do not damage your natural nails when removed correctly. Damage happens when you peel or pry them off forcefully, which can strip layers from the nail plate. To avoid damage, soak the nails in warm, soapy water, lift gently, and never pull. After removal, moisturize your nails and cuticles with oil or a rich hand cream. If you notice pain, redness, or swelling, stop and consult a healthcare professional.
How long should you soak press-on nails before removing them?
Soak your press-on nails in warm, soapy water for at least 10 to 15 minutes. For glue-on nails, you may need to soak longer, up to 20 minutes, or use a small amount of acetone. Adhesive tabs typically release within 5 to 10 minutes. If the nail still resists after 15 minutes, re-soak rather than forcing it. Patience protects your natural nails from damage.