

Last Updated: October 30, 2026
Quick Summary
To make press on nails look natural, choose a size that sits just inside your nail's sidewalls, prep your nail by wiping it with rubbing alcohol, and file the edges to follow your nail's curve. Thinning the cuticle edge and seating the nail slightly back from the cuticle also reduce bulk.
- Size each press-on to sit just inside your natural nail's sidewalls
- Wipe nails with rubbing alcohol to remove oils and let them dry fully
- File the outer edges from the outside toward the center in small amounts
- Taper the underside of the cuticle edge with a 240-grit or finer file
- Seat the press-on 0.5 to 1 mm back from the cuticle line
Table of Contents
- How to Choose the Right Press-On Nail Size
- Prep Your Natural Nails Before Applying Press-Ons
- How to Shape Press-On Nails for a Natural Fit
- How to Apply Press-On Nails Without Bubbles
- How to Make Press-On Nails Less Bulky
- Troubleshooting Press-Ons by What You See
- Removing Press-Ons Safely and Keeping Your Natural Nails Healthy
- Book Your First Set and Try the Full Routine This Week
- Frequently Asked Questions
How to Choose the Right Press-On Nail Size
Getting a natural look starts with the right size, and most bad press-on results trace back to a poor fit. Sets that include multiple sizes let you match each nail to your own nail width and shape.
Measure your natural nails before you buy. Lay each nail flat and compare its width to the nail bed you want to cover.
A press-on that is too wide will overhang the sidewalls and look bulky. A press-on that is too narrow will leave your natural nail showing on the edges, which looks unfinished.
- Choose a size that sits just inside your nail's sidewalls
- Pick one slightly longer than your nail if you want length
- Test two sizes on a few nails, then keep the best fit
For a more detailed walkthrough of sizing, read How To Choose Press On Nail Sizes. If your nails are narrow, our guide to press on nails for small hands covers fit in more detail, and best press on nails for small nail beds lists styles that suit narrow beds.
Prep Your Natural Nails Before Applying Press-Ons
Prep decides how long a press-on stays put. Oil and lotion on the nail will make even a perfect fit lift within a day.
Start by gently pushing back your cuticles and removing any old polish. Then wipe each nail with rubbing alcohol to remove oils. Let the alcohol dry completely before you apply anything.
Watch out: Do not skip the alcohol wipe. Hand cream residue is the most common reason press-ons pop off early.
How to Shape Press-On Nails for a Natural Fit
Shaping is where a press-on starts to look like your own nail. Most sets arrive in a standard shape, and a light file can make it match your nail's curve.
Use a fine-grit file and work from the outside edge toward the center. Take off small amounts at a time, because it is easy to file too much.
- File the free edge to match your natural nail length
- Round the corners so they follow your nail's natural curve
- Thin the edges near the cuticle so they blend in
How to Apply Press-On Nails Without Bubbles
Bubbles and gaps usually come from pressing down unevenly. Line the nail up straight before you press, then hold it firmly for about 10 to 15 seconds.
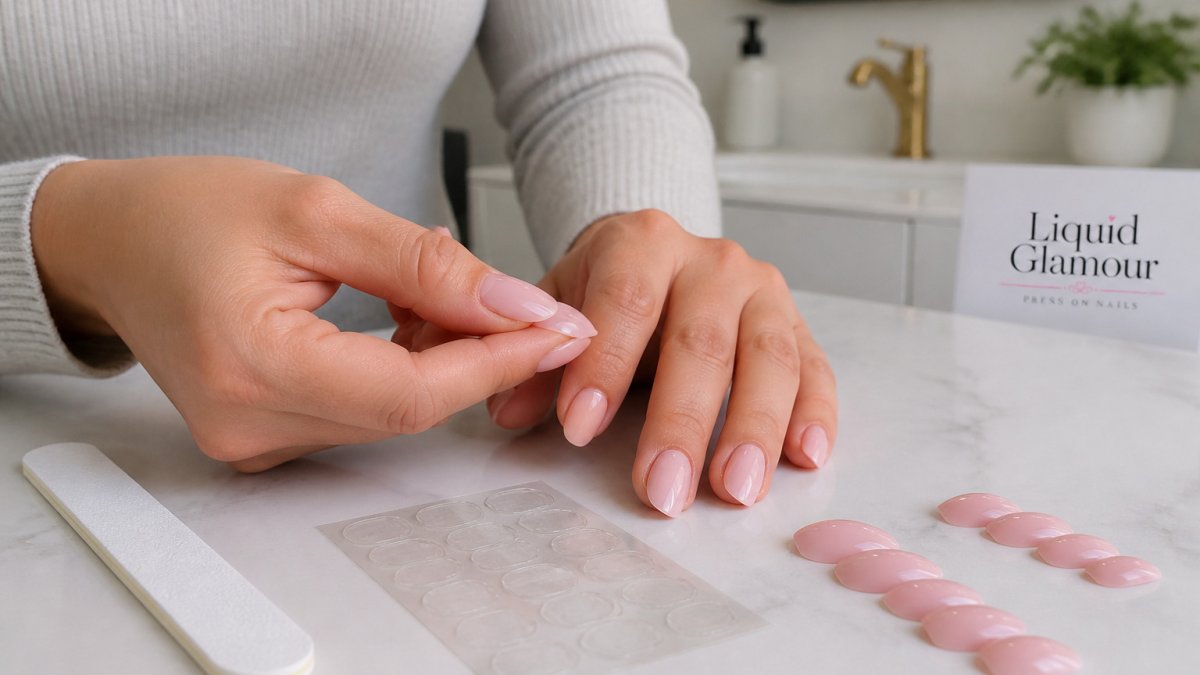
Start at the cuticle and work toward the tip. Press in the center first, then along each side. This pushes air out instead of trapping it under the nail.
If you see a small gap, lift the nail gently and press again. Do not force it, or you may crack the press-on.
Glue Versus Adhesive Tabs: Which to Use
Adhesive tabs are easier for beginners and can be removed cleanly. Nail glue usually holds longer, especially if you use the press-ons for several days.
A common approach is to use tabs for short wear, such as an evening out, and glue for a week of daily wear. Some
How to Make Press-On Nails Less Bulky
Bulk is the single biggest tell that a press-on is not your own nail. The eye reads thickness at the cuticle and along the sidewalls before it reads color or length, so thinning those two zones does more for a natural look than any polish choice.
Why press-ons look thick. A press-on has to be strong enough to survive wear, so the factory leaves material at the cuticle edge and around the sidewalls. When that edge sits on top of your natural nail plate, it casts a shadow and creates a visible step.
The cuticle-edge taper. Use a fine-grit file (240 grit or higher) and work only the underside of the press-on within about 2-3 mm of the cuticle edge. Angle the file so you are shaving the underside, not the top surface.
Sidewall thinning. The sidewalls are the second place bulk shows. Hold the press-on so you can see the inner curve and lightly file the inner sidewall where it would overhang your natural sidewall. The goal is a press-on whose edge follows your nail's curve instead of sitting proud of it. Do this in small passes, sidewall material is easy to remove and hard to add back.
Cuticle placement, not just cuticle filing. Where you seat the press-on matters as much as how thin it is. Position the cuticle edge just shy of your cuticle line, roughly 0.5-1 mm back, so the edge sits on flat nail plate rather than on the curved skin fold. A press-on pushed tight against the cuticle will lift there first and look thickest there.
Do not build up with glue. Extra glue to fill a gap adds a visible ridge and squeezes out at the cuticle, which is exactly the bulk you are trying to remove. If a press-on will not sit flush after thinning, the size is wrong, resize rather than glue-fill.
Natural Soft Pink Squoval Solid →
Quick bulk checklist:
- Cuticle edge tapered on the underside within 2-3 mm of the edge
- Sidewalls thinned to follow your natural curve
- Press-on seated 0.5-1 mm back from the cuticle line
- No glue ridge or squeeze-out at the cuticle
- Edge feels flush, not stepped, when you run a finger across it
If the press-on still looks thick after this, the problem is usually length and shape rather than thickness, a shorter, squoval or almond shape reads thinner than a long square even at the same material thickness.
Bulk comes from a few specific zones, and each has a fix you can check against the steps below.
| Bulk source | Fix | Key detail |
|---|---|---|
| Cuticle edge | Taper underside with 240+ grit file | Work within 2-3 mm of edge |
| Sidewalls | Thin inner curve to follow nail | File in small passes |
| Cuticle placement | Seat press-on back from cuticle | Leave 0.5-1 mm gap |
| Glue buildup | Skip glue fill | Resize instead of filling |
| Length and shape | Choose shorter shape | Squoval or almond reads thinner |
Troubleshooting Press-Ons by What You See
Most press-on problems announce themselves visually before they fail. Match what you see to the cause below, then fix the cause rather than re-pressing the same nail and hoping.
Crooked placement. If the nail sits at an angle, the free edge is not parallel to your fingertip. The cause is almost always lining up the press-on by eye from above instead of from the side.
Sidewall overhang. If the press-on edge hangs past your natural sidewall, the size is too wide. Overhang catches on hair and fabric, lifts first, and reads as bulky. Size down, or file the inner sidewall to match your natural curve. Do not file the outer edge to hide overhang, that thins the structure and the nail will crack.
Natural nail showing at the sides. The opposite problem: the press-on is too narrow and your own nail peeks out at the edges. This looks unfinished and lifts at the exposed edge. Size up, or choose a shape with a wider sidewall coverage.
Lifting at the edges. Edge lift usually means oil or moisture was left on the nail plate, or the edges were not pressed long enough. Clean and dehydrate the nail again, then hold each edge for a full 10-15 seconds.
Lifting at the cuticle. Cuticle lift is a placement problem more often than an adhesion problem. A press-on seated too close to the cuticle sits on the curved skin fold and lifts as the nail grows out. Reseat it 0.5-1 mm back from the cuticle line.
Bubble or gap under the center. Air trapped in the center means pressure was applied unevenly. Remove, reapply, and press the center first, then each side, working from cuticle to tip. A bubble left in place becomes a lift point within a day or two.
Nail looks too long or too wide. Length and width are separate fixes. File the free edge shorter in small passes for length; resize or thin the sidewalls for width. Do not try to fix width by filing the tip, that changes the shape without fixing the fit.
Nail feels thick. Go back to the cuticle-edge taper and sidewall thinning steps. Thickness at the cuticle is the most common "fake" tell and the easiest to fix with a 240-grit file.
Glue versus adhesive tabs, by symptom. If your problem is short wear, tabs are fine. If your problem is lifting, gaps, or bubbles, glue gives a more forgiving bond because it fills small irregularities in the nail plate, but only if you press evenly. If your problem is removal damage, tabs come off cleanly and glue needs a proper soak. Match the method to the failure you keep seeing rather than to what came in the box.
Removing Press-Ons Safely and Keeping Your Natural Nails Healthy
Removing press-ons the wrong way can peel off layers of your natural nail. Soak the nails gently in warm water for a few minutes to loosen the glue, then lift each press-on slowly from the side.
Never pull a press-on straight up. Take your time, and stop if you feel pain.
To make wear last longer, our guide on how to make press on nails last longer explains simple habits that help. For a complete removal walkthrough, see how to remove press on nails safely.
American Academy of Dermatology guidance on nail health
Book Your First Set and Try the Full Routine This Week
Start with one set, follow the sizing, prep, and application steps, and you can see how press-ons work for your nails. Liquid Glamour Nails offers reusable sets with options like the Natural Soft Pink Squoval Solid at $6.99 and the Solid Blush Almond Nails at $12.99.
Frequently Asked Questions
Which press on nails look most natural?
Short to medium shapes in soft, natural tones such as soft pink, blush, and medium beige tend to look the most natural, because they blend with your own nail color and do not draw attention to the set. Squoval and almond shapes read as the most lifelike for most people, since they follow the curve of a natural nail. Liquid Glamour's Natural Soft Pink Squoval Solid ($6.99) and Solid Blush Almond Nails ($12.99) are good starting points if you want an everyday, understated look.
Why do my press-ons look bulky?
Bulk usually comes from a size that is too large, a thick layer of glue, or a nail that was not filed thin enough at the cuticle area and sidewalls. Check that the press-on sits flush against your natural nail without overhanging the sides, and use only a thin layer of adhesive. Filing the underside of the press-on near the cuticle and tapering the free edge will also reduce the chunky look.
How do you choose the right size press-on nail?
Measure each natural nail at its widest point, from sidewall to sidewall, and match each finger to the press-on that fits closest without overhanging. If a press-on is slightly too wide, file the sides gently until it sits flush against the nail. Sizing each finger individually rather than using one size for the whole hand is the most reliable way to get a natural fit.
How do you keep press-on nails from lifting at the edges?
Lifting usually starts when the nail plate is oily or the press-on was not pressed down firmly. Clean each natural nail with rubbing alcohol to remove oils, then apply adhesive and hold the press-on in place for 10 to 15 seconds. Avoid trapping water under the edges during the first day, and reapply glue at any spot that begins to lift.
